Manage tables
This (Help Scout) site is in the process of being replaced by a new knowledge base. Please refer to the relevant page on that site and update links/bookmarks you have saved.
In this article
3 Insert/delete columns or rows
5 Adding/removing formatting borders
8 Selecting entire rows or columns
11 Create a table without title (for layout reason only)
1 Add/remove a table
- To add a table, put your cursor at the location where you want to add the table and click on Table from the INSERT menu. You can either select: to add a Table with title or Table without title.
- Table with title
- A table that will be listed in the list of Tables and has an automatic label (e.g. Table 1) and a title. These tables can have notes and footnotes associated.
- Table without title
- A simple table without label and title, notes or footnotes. These tables are mainly used for layout purposes, to arrange elements in a tabular layout.
- Table with title

- It is also possible to enter the number of rows and columns manually using the "Insert table..." option

- Two new items called TABLE and TABLE STYLING will appear in the Menu bar whenever your cursor is inside a table:

- The TABLE menu contains table formatting tools like adding rows, columns, merging cells, changing the text alignment etc.
- Please note: Most of the menu items available in the TABLE menu can also be accessed by right-clicking in a cell of the table.
- The TABLE STYLING menu contains options to enrich table layouts with borders, border styles, background colors, etc.
- It is possible to set the size of the table, the orientation and dimensions to be displayed in the final exported version of the draft by clicking on the edit icon.

Please note
- The size of a table set in the OSD platform cannot be viewed in the online draft version. It is applied to table only when the final draft is exported.
- Rows, columns, cell(s) can be selected by clicking and dragging

- Background color of selected rows, columns, cell(s) can be modified to three shades of grey:

- If you are working with a large table, you can expand the table view with the Expand icon:

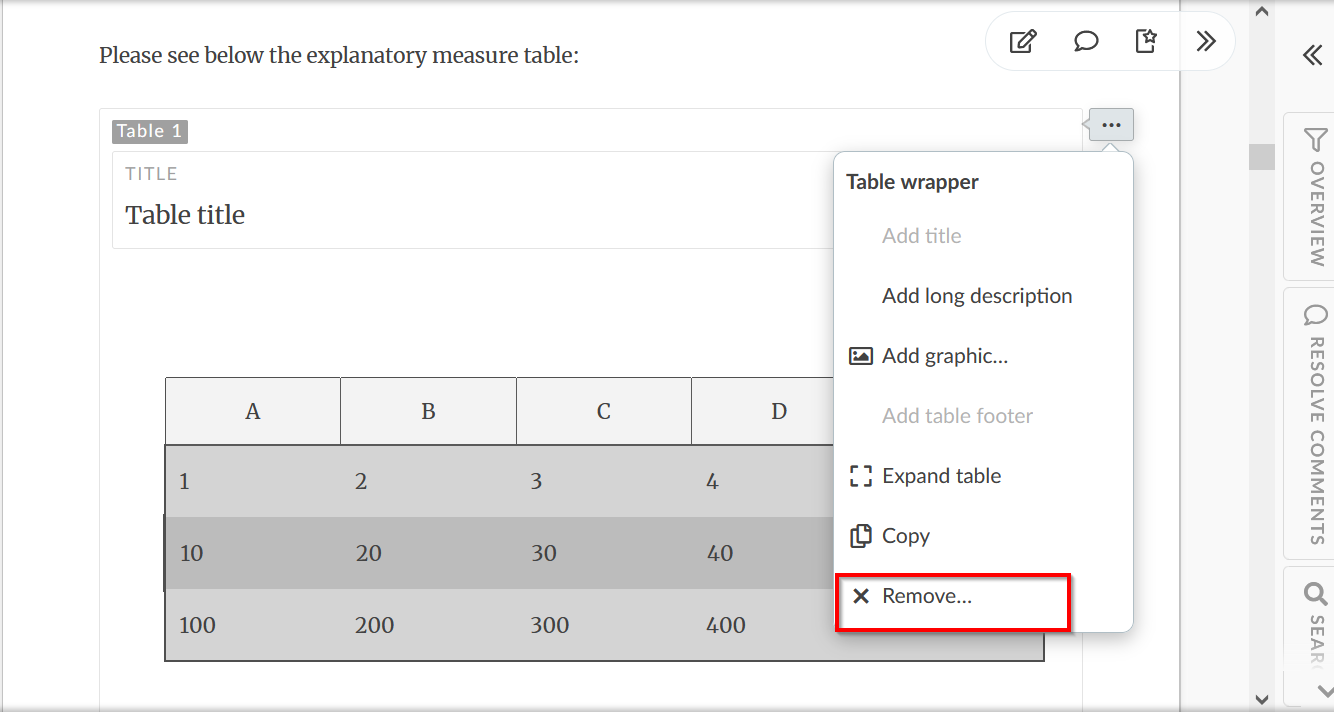
- To delete a table, select Remove from the contextual menu of the table.
2 Make a row the header row
- By default, the first row of your table will be a header row (light grey background). Place your cursor anywhere in the table and select Add header row from the Headers menu to make the second from the top an additional header row.

- Similarly, you can remove a row as header.

Please Note
3 Insert/delete columns or rows
Place your cursor inside a cell and:
- select Add row above/below from the Row option (TABLE menu) to insert a row
- select Add column left/right from the Column option (TABLE menu) to insert a column
- select Remove row from the Row option (TABLE menu) to delete a row
- select Remove column from the Column option (TABLE menu) to delete a column
Alternatively
- You can use also add rows/columns to a table directly from the table by using the "+" icon inside the table or by right clicking inside a cell and selecting the appropriate option.
- You can also select an entire row or column and then click on the Remove icon that appears in the menu.

4 Split/merge cells
Place your cursor inside a cell and:
- select Split into rows from the Split cells option of the TABLE menu to split a cell into two rows
- select Split into columns from the Split cells option of the TABLE menu to split a cell into two columns
- select the cells you would like to merge and click on Merge cells in the TABLE menu
Alternatively
- you can use split or merge cells by right clicking inside a cell and selecting the appropriate option:

Please Note
5 Add/remove border formatting
- By default, a table has the line borders of width = 1x.
- You can add and/or remove border formatting and border styles for selected row(s), column(s) and cell(s) using the Line weight and Line style dropdown options in the TABLE STYLING menu.

6 Define column width
- To change the width of your columns, use the "Set column size..." option in the TABLE menu.
- In the Edit column sizes pop-up window that appears, drag the columns to adjust their widths.
- To divide your column evenly, select the Divide Evenly button.
- Once you are happy with your selection, click on the Apply button.
- Click on the Close button to close the Edit column sizes pop-up window.

7 Text alignment in cells
- To change the alignment of the text inside a cell, use the text alignment options available in the TABLE menu. You can align the text vertically (top, bottom, middle) and/or horizontally (left, right, center) as required.
- You can do this one cell at a time, or select a whole row/ column to apply the formatting to.

8 Selecting entire rows or columns
- You can click on the small rectangle at the beginning of each row / column to select the entire row / column. You can then apply formatting and option to the entire row / column

9 Add table footnotes
- When a new table is inserted, it automatically has a placeholder for a table footer

- To add a footnote to a table, place your cursor at the location where you want to insert the footnote and select Footnote from the REFERENCE menu. Then type the footnote text in the TABLE WRAP FOOTER.
- You can reference the same footnote multiple times inside the same table. To do this, place your cursor where you want to add the reference select Link to an existing table footnote from the REFERENCE menu.

10 Add table notes
- To add a Note to the table, place your cursor in the TABLE WRAP FOOTER and select Note from the INSERT menu.
- You can also add notes by selecting Add note from the contextual menu of the TABLE WRAP FOOTER.
Please Note

11 Create a table without title (for layout reason only)
- If you want to format your text in tabular format, without creating a formal table, select the option Table without title from the INSERT menu and select the number of columns and rows.
- By default, the layout table (also called an ARRAY table) is created without a header, and it has fewer options (no table footer or table note)

Related articles
- For more information about footnotes, please view the article Add footnotes.